Hey everyone!! A lot of people have been asking me to give a little tutorial on how I shoot my photos. And, if you know me, I love sharing whatever knowledge I can with others, but first, I should probably just let everyone know that, I am almost 100% self taught. I have read a little here and there to give me some guidelines, but all of my advice and techniques (if you can even call them that) are things I have adjusted and figured out in my own way. Why am I telling you this? Well, because I’m sure there are many of you out there that are much better then me and know the proper way of doing things. So here is my little disclaimer. I’m not saying this is the right way to do it. I’m just saying this is how I get my results.
So, to understand how I photograph my food, you probably are going to need to see my set up. Which includes my kitchen. But, first things first. Before you can even worry about set ups or lighting, we need to talk about equipment. In my opinion, your photos can only be as good as your camera will let them be. I’m not saying that people can’t get beautiful pictures from a simple camera. I’m just saying that you’re gonna have to work harder for them, and probably get less definition then with a better camera. (As a side not, if you are planning on going out and getting a camera, knowing this helped me. When picking out your camera I highly recommend going down to a store and holding them first before purchasing. Cameras are like clothes. Each one is going to fit you differently, so test drive them first because this is a big investment.)
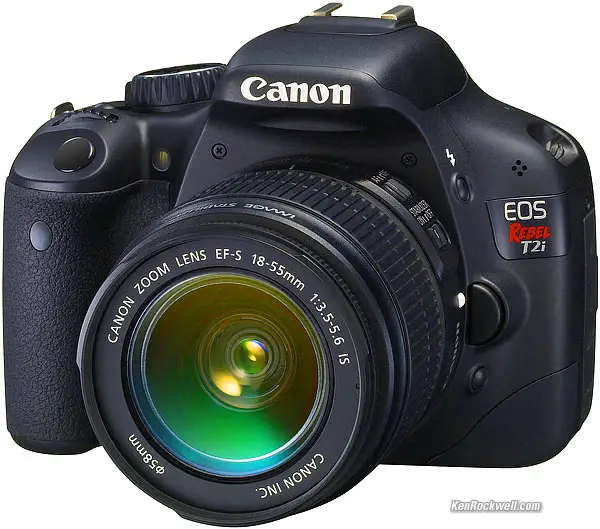
This is my camera. It’s a Canon T2i and I absolutely love it. Seriously!! I am actually emotionally bonded to my camera. When we went on our trip to the Caribbean a couple weeks back, my husband got to use it like twice before I quickly took it away so he wouldn’t damage it. I know. Obsessive, but it’s true. My camera isn’t all I use for my pictures though. With this camera you will get a standard, but still very nice, lens which comes with it, but I only use this lens for every day pictures. For my food pictures, and especially my finished products, I use a Tamron 90mm Macro Lens. That way I can get in really close and still be able to get really clear, detailed shots. I also use a Sigma Mounted Flash on top of my camera. This gives me the ability to bounce the flash off of walls or the ceiling, and provides amazing lighting from above instead of straight on, making a better picture.
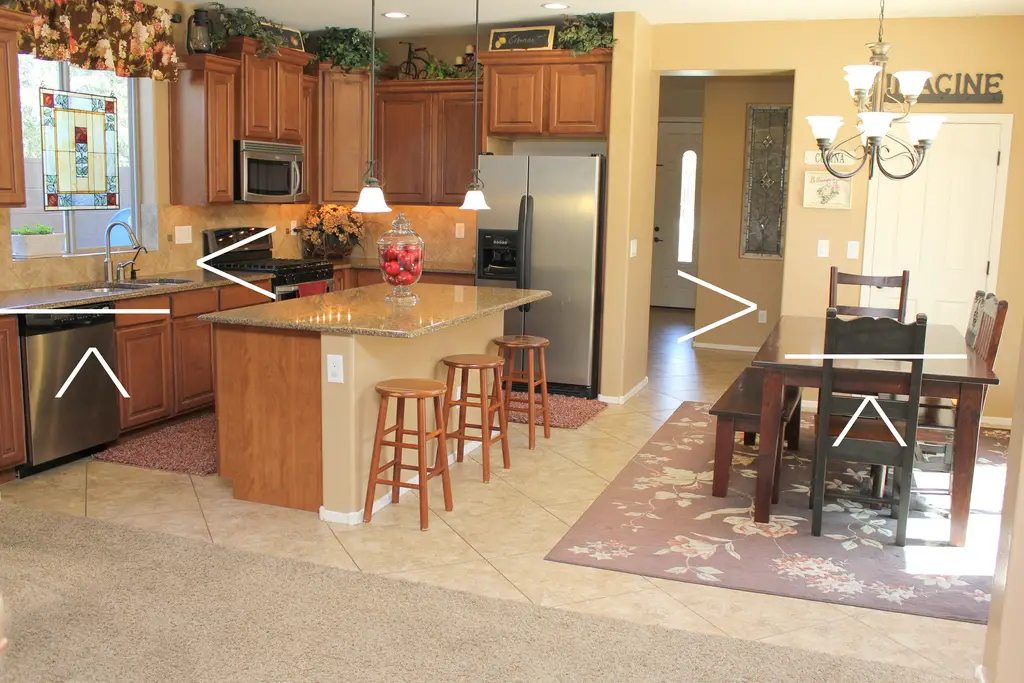
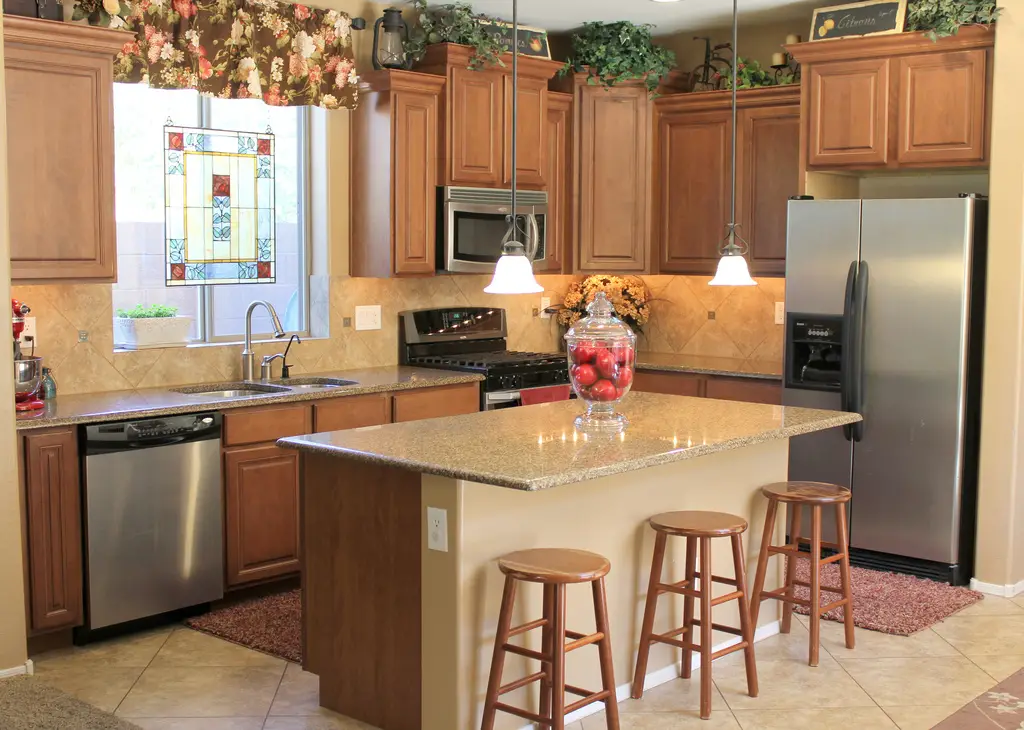
K, now that you know what equipment I use, lets talk about lighting and take a look inside of my kitchen 🙂 Lets start with my kitchen first!! Isn’t is pretty? Sorry, I love my kitchen. But this is where I not only make all my food, obviously, but also where I take all of my photographs. Which brings me into how I light my food.
I’m probably gonna tick a bunch of people off by saying this, but I don’t believe there is any one right way to light your food. The only thing I am going to say is, you will get the best results if you photograph your shots in natural lighting. These two places, (above picture), are the only two places I photograph my food. In the afternoon, when the sun completely overtakes my table and is then too bright to photograph anything over there, I shoot my photos under the window by the sink. But any other time when I don’t have direct sunlight on that table, I take my pictures there. I never ever take my pictures in direct sunlight because it will totally wash your pictures out. Right where the sun is at in the picture above is perfect, because I’m getting a lot of natural light on that table without actually having the sun on it, like it is on the floor. Make sense?
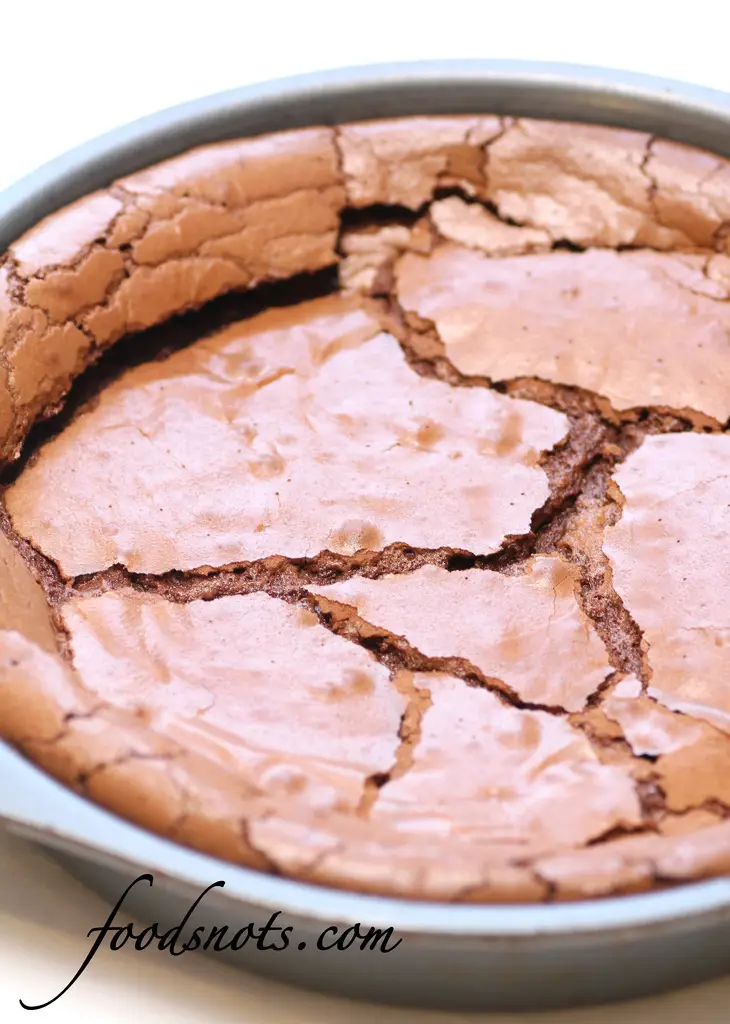 |
| Gluten Free Chocolate Cake |
Now, back to what I said earlier, I really don’t think there is one right way to light yours food, and what I mean by that is, I have read a couple of articles that say always light your food from the back, like I’ve done here. If you can see, (above picture), the light is coming from behind the cake pan and is casting a shadow toward us below the pan. So, yes, I do love this technique and it is how I photograph the majority of my pictures, but…
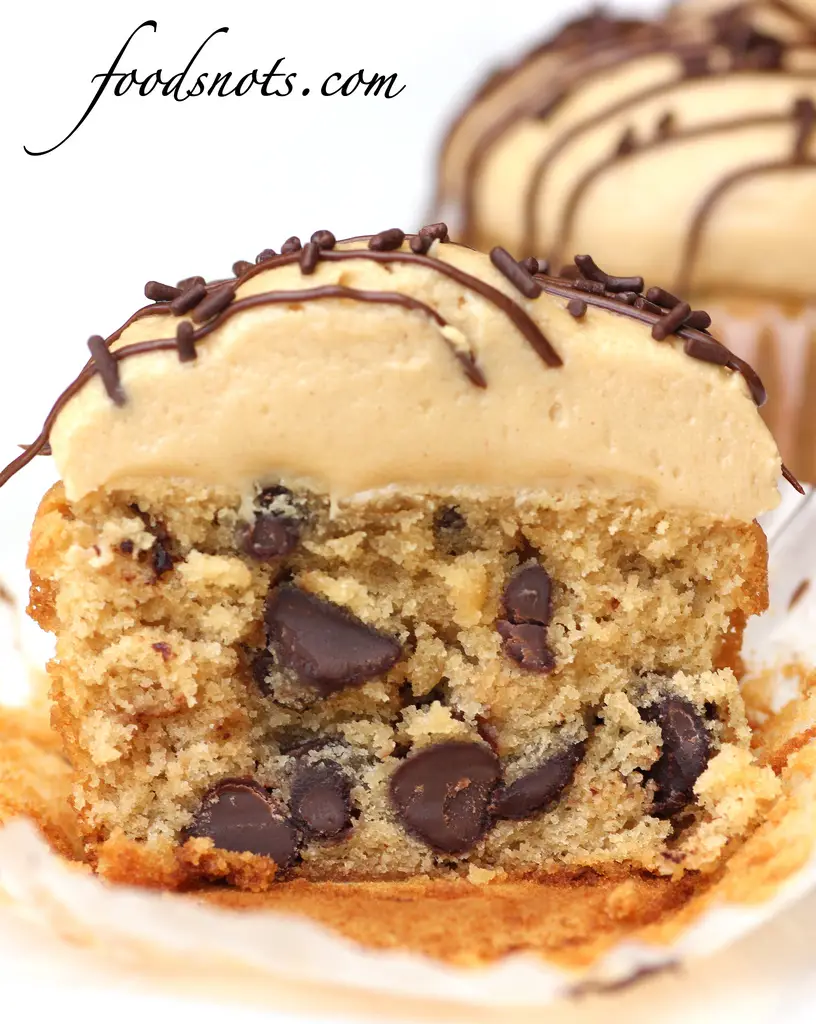 |
| Peanut Butter Chocolate Chip Cupcakes |
What if you want to take a picture with lots of texture? Like this one. This picture is lit from the front casting the shadow behind it. The reason I had the light hit the front of this instead of the back is because I wanted to be able to see all those little crumbs crisply and clearly without being darkened by the shadow. So, you find how you want to light your food. Each of us as photographers has our own style and ways of doing things, so embrace it.
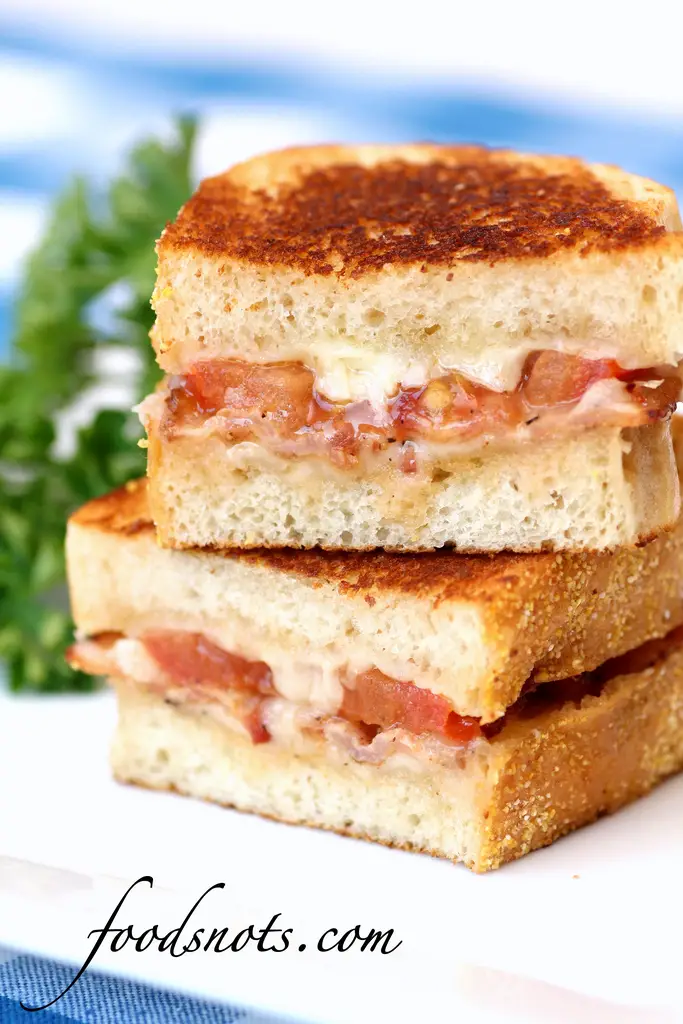 |
| Garlic-Rubbed Grilled Cheese with Bacon and Tomatoes |
Third rule I play by most of the time is: Get low and Get in close. Food doesn’t really like to be photographed from above, which is a mistake I find most amateur photographers make. Just think of it this way, you don’t like photos to make you look fat, and food doesn’t like photos that make it look flat, which is what photographing it from above is gonna make it do. So no photos from above!! Squat down, and play with your angles. (Of course there are some exceptions to this, but for the most part this is true.)
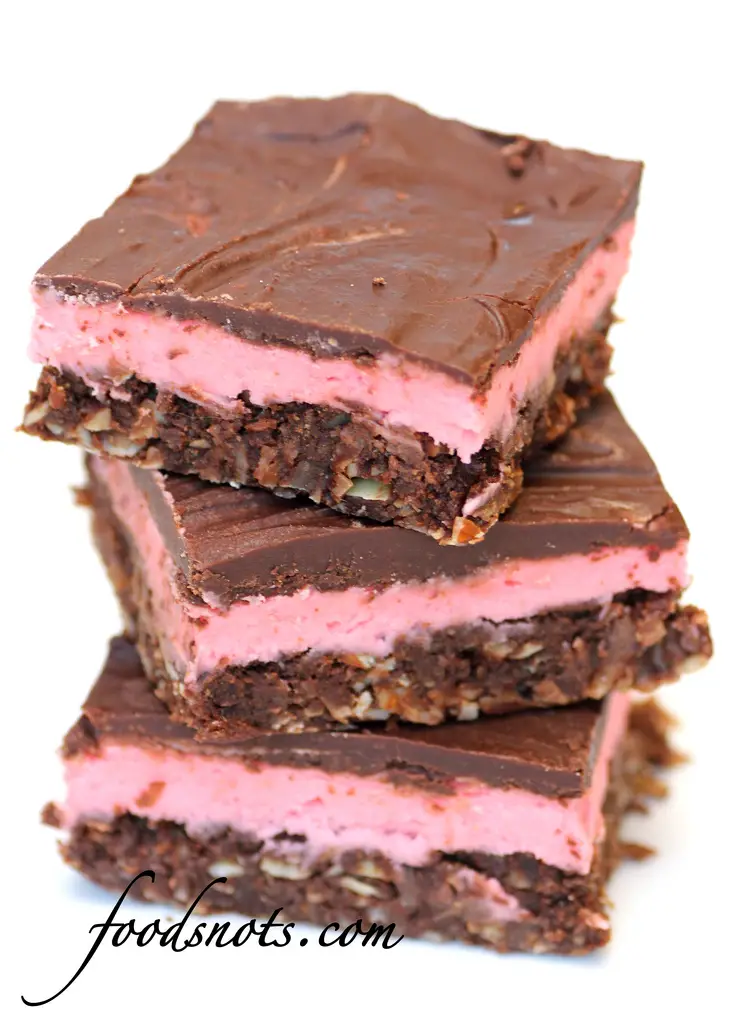 |
| No Bake Nanaimo Bars |
Also, don’t be afraid to get in close. This is easier if you have a lens that can capture more detailed pictures, like a macro lens, but even if you can’t zoom way in, don’t just take a picture of your whole plate of food. BORING!! Get off centered, stack it, or add something a little extra to make your dish pop.
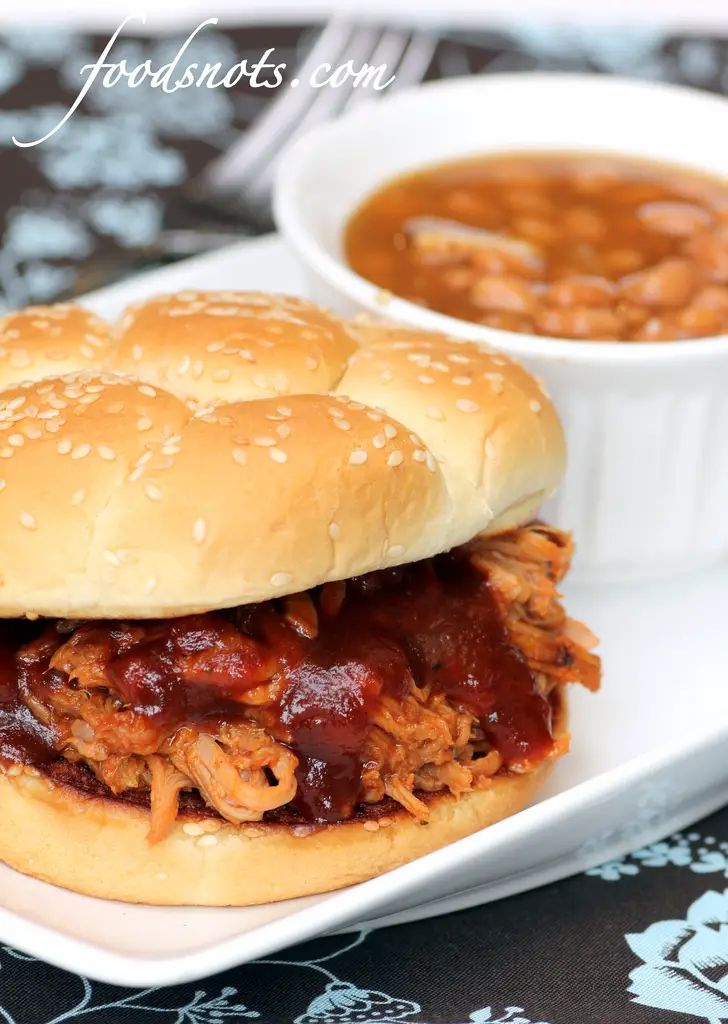 |
| Slow Cooker Texas Pulled Pork |
Which brings me onto staging. It’s probably obvious, if you’ve followed me for a while, that I like simple, clean, crisp photographs. I don’t like to clutter my photos with a lot of extras, but that’s just my style. I’m not saying it’s the right way, it’s just my way. But every once in a while I like to mix it up and set an elaborate stage for my food.
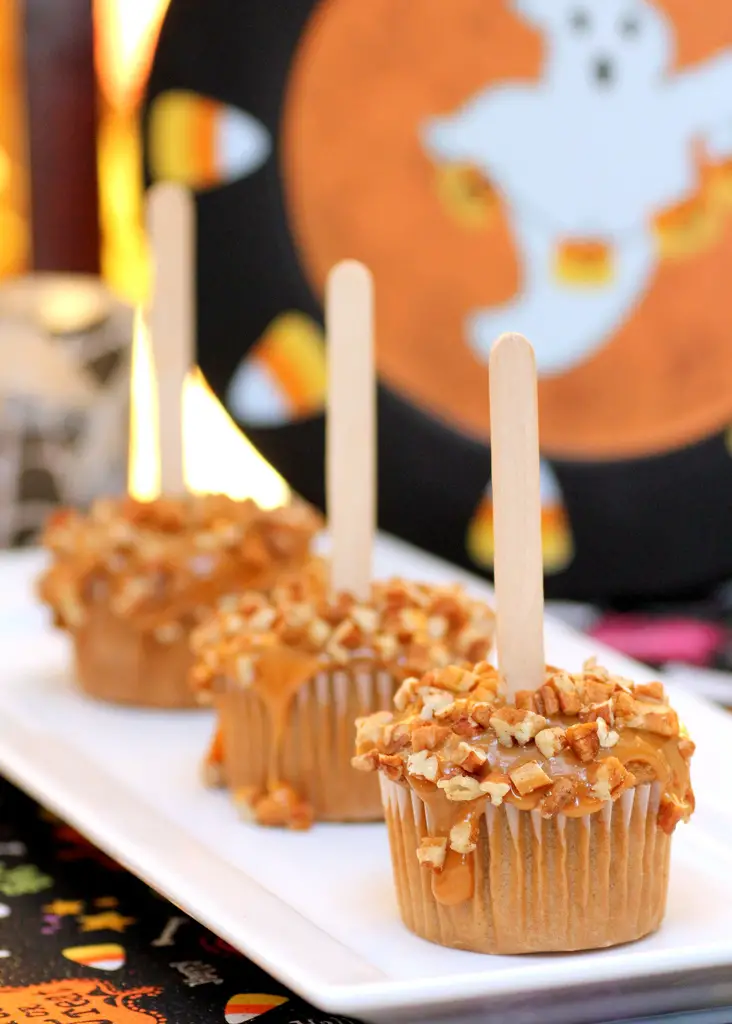 |
| Caramel Apple Cupcakes |
Things to be careful of though. You really don’t want your photos to come off cluttered, like this one (this is my own photograph, so I’m aloud to bash it). Not only is the lighting totally wrong with that glair coming through my curtains, but there is way to much going on!! There is a pattern on the table, then there is a pattern on the plate, and then there’s the candle holder. You almost can’t even see the amazingCaramel Apple Cupcakes. So don’t over clutter!!
When I stage, I never ever put anything on my food to enhance it. Ever!! I try to photograph my food as intended by the recipe. This is how I get my fresh, natural look. Food is going to look best served the way it’s meant to and not to mention, it annoys the Holy Hanna out of me when I try to recreate something, just to find it’s been so doctored by food stylist that there is no way my food is ever gonna look like that. I like to represent realism in myself, my writing, and in my food. So this is what I do. Again, I’m not saying that your wrong if you want to use Elmer’s glue to add the illusion of milk drops on your food, but I plan on eating what I make after I photograph it. So I have no advise on enhancing except if you want your casserole dish to look steamy and to have that warm sheen, then heat it up, or photograph it while it’s hot.
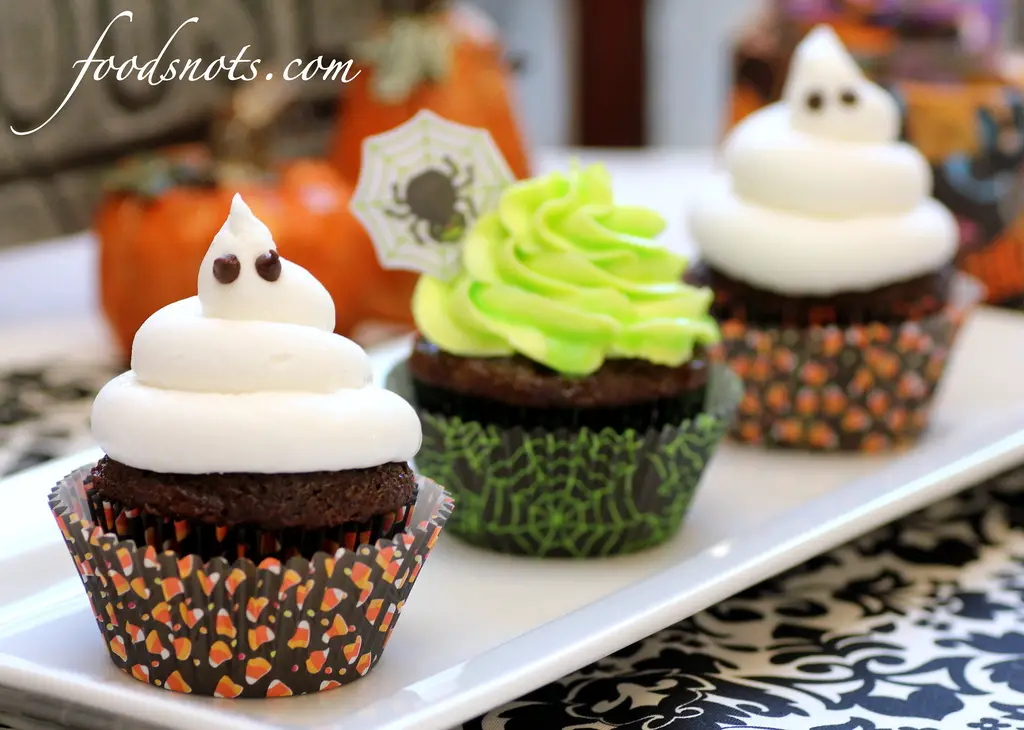 |
| Ghoulishly Glowing Cupcakes |
Sorry, I got on a venting roller coaster. Back to staging. K, things to remember that help me is first: find a focal spot on your dish, then stage around that. This is also the spot you are gonna want to be in focus. Second: when staging, you want to create movement in your picture. No I’m not saying actual movement, like my pouring pictures, but you want to create a stage where your eye naturally moves smoothly around the picture.
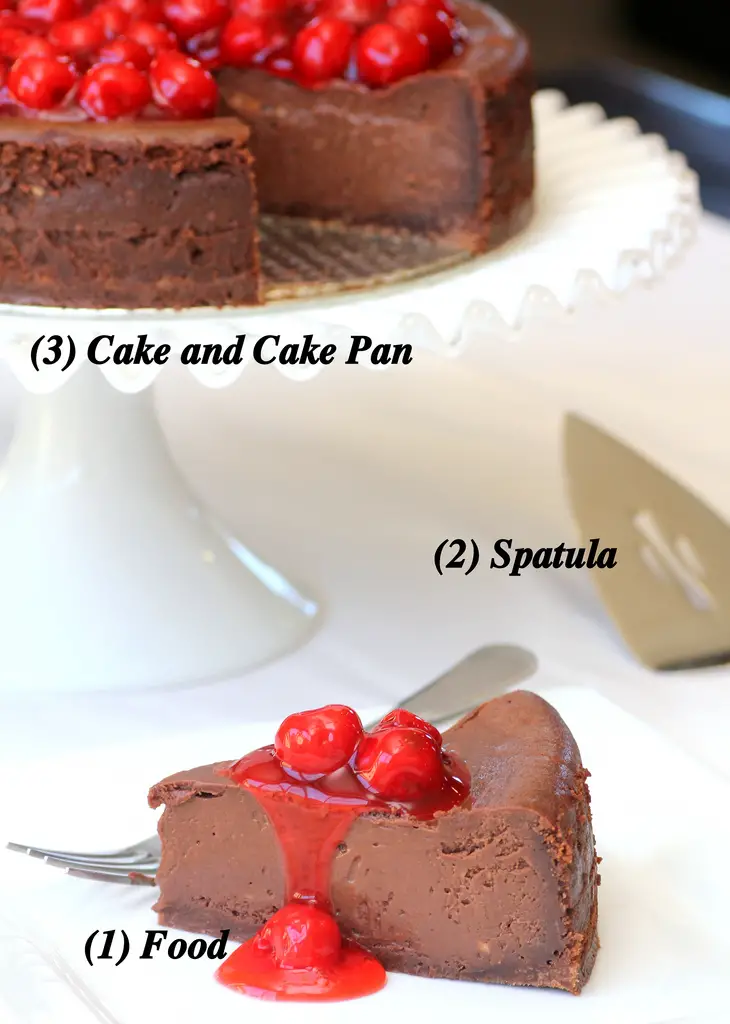 |
| Cherry Fudge Brownie Cheesecake |
For instance, I like to have 3 different focal pieces in my pictures when staging, that kind of create a circle. The main focal piece is, obviously, the food. Other assisting focal pieces might be a whisk or an ingredient that I used in the recipe like cinnamon sticks or my mason jar of brown sugar. Then when I know what I want to incorporate into the picture, I try to stage everything so your eye moves from the food (1), which is normally in the center, up the right side of the picture to the next focal point (2), then to the top left corner to the next focal point (3), and then back to the food (1). That’s probably getting really deep, but you just want to try and create a flow in your pictures so your eyes have a direction of where to go, which will make your picture in turn more visually appealing.
 |
| Frosted Cookie Brownies |
Other quick hints for staging. 1) Never ever have horizontal lines. Diagonals are always better visually. 2) Odd numbers are your friend. It’s better to have either 1,3, or 5 of something then 2 or 4. I don’t know why this is, but things staged in odd numbers create a better picture most of the time. 3) Don’t forget to add some green. In my windowsill I always have mint growing so that when needed, I can agrab a cluster of mint leaves to add depth to the picture. 4) Look at other peoples pictures. If you like something someone else has done, don’t copy it, but try and recreate the same feel in your own photos with your own spin on it. And really, just have fun with it and relax. If you start getting frustrated that something isn’t working out, take a deep breath, walk away, and come back to it in a couple minutes.
A secret I use to keep myself focused is, I listen to music. If you ever come into my kitchen while I’m baking, cooking, or photographing my food I almost always have music playing in the background. Cooking is my therapy, and music is also very therapeutic to me, so I put the two together and it calms me. So find something like that to help you. If you guys don’t laugh too terribly hard, I’ll share my cooking mix with you guys (above). I have everything on it from country, to rock and roll, to hip-hop, and everything else in-between. But it suites me 🙂
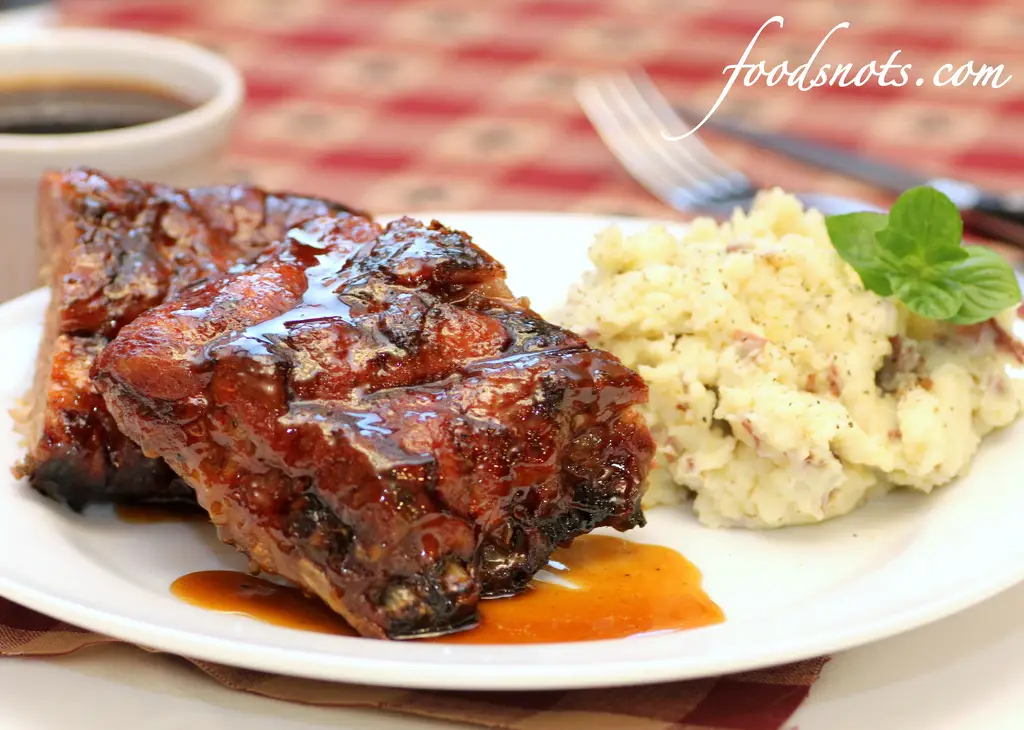 |
| Jack Daniel’s Glazed Ribs |
Lastly, editing. I use Picasa to edit all of my photos. Yes, I edit every single photo that I put on my blog. Some photos don’t really need much, so I crop it, watermark it, and leave it alone. But others need the color corrected, or need to be highlighted. So I use Picasa to do this and I love it. Not to mention it’s a free download, so you really can’t go wrong just trying it out. Once you figure out what everything does, it can really help you to enhance the look of your photos.
 |
| Strawberry Cream Cheese Tart |
Well, I think that’s pretty much it. I know I’m probably going to post this, and remember something I just have to add, but as far as I can think of right now, these are all my little secrets. Hope this has helped some of you to discovering your own style as a photographer, and have an awesome day!!